How to Disable Directory Browsing in WordPress using cPanel | 403 Permission Denied
You can protect your Website from hackers by Disable Directory Browsing in WordPress | Disable Directory Listing in cPanel | Disable directory listing htaccess wordpress | Preventing a Directory Listing
If you want to disable directory browsing in WordPress website, just follow the below steps.
First of all, Login to your Web Hosting Account and go to cPanel.
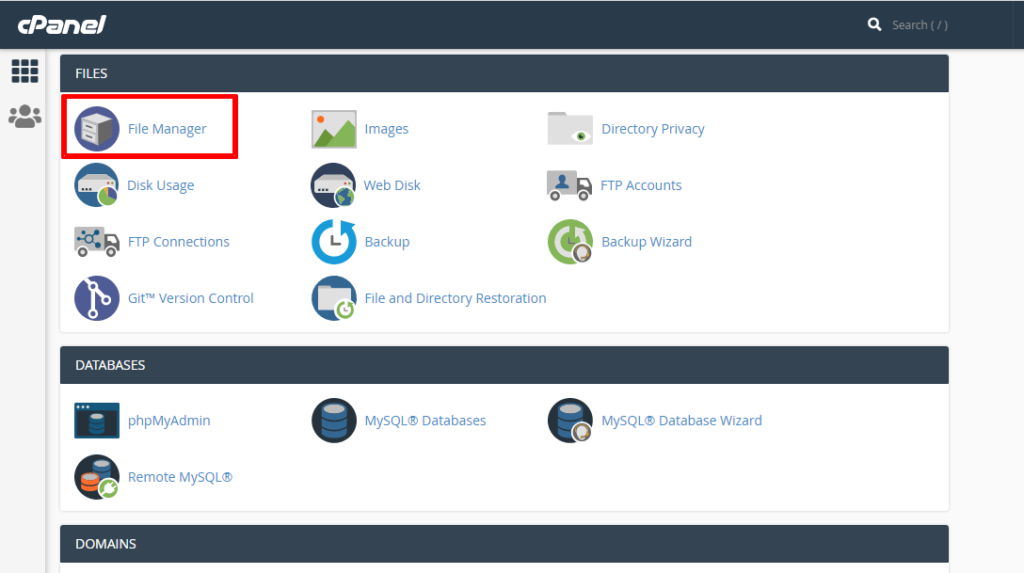
Next, Go to Files section and click on File Manager. (as showing below)

GoDaddy cPanel Hostinger cPanel

Select Root directory of your Website and then check the box that says Show Hidden Files.
You will be taken to another screen, then scroll the files and look for the “.htaccess” file. Before you do any changes in this file, just make a backup copy of this file before open this file.
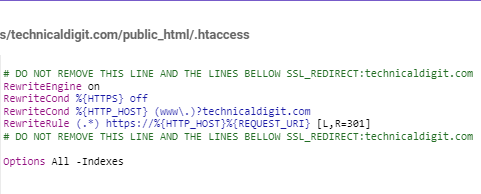
Next, edit original “.htaccess” file. It will look like below snippet.
.htaccess file

Now copy the below one line of code and paste it at the end of the file so that it looks like this:
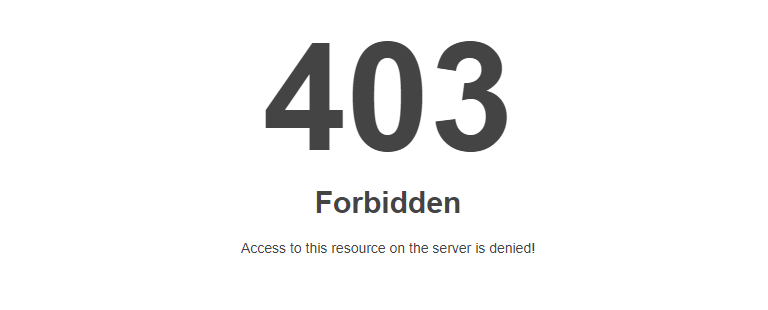
Save your changes and close the file. Now Directory browsing is disabled on your WordPress site and your website directory is not visible to anyone. If someone tries to browse your public directory then it will get a 403 Forbidden Error or Permission Error. You can check this by accessing below URL:
https://<YOUR-WEBSITE>/wp-includes/
Conclusion:-
Your files are important and should be always kept private. So by using this method, you can easily disable directory browsing in WordPress website.