How to Install OPAC in SOUL | Configure Web OPAC in SOUL2.0 Software
Note: Before you Install OPAC in SOUL2.0 please check that IIS 6 or higher has been enabled in your SOUL server.
To install OPAC in SOUL 2.0 Server, Execute setup.exe in “S20WEB” folder from SOUL2.0 Installation CD .
There are instances that some of IIS configuration may not allow direct installation of WebOPAC due to authentication issues. In such cases, please copy entire ‘WebOPAC’ folder to your IIS’s web root, create an application using IIS Administration.
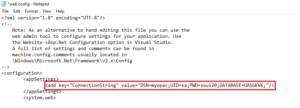
The next step is to edit ‘web.config’ file which is available in ‘WebOPAC‘ folder, please look for the following lines and feed-in the values which are marked as bold:
<addkey=”ConnectionString” value=”DSN=myopac;UID=sa;PWD=soul20;DATABASE=UASGKVK;”/>
Next, open IIS in Control Panel (Administrative Tools), right-clicked on the virtual directory folder(WebOPAC) for this site, and select “Convert to Application.”
Please note that for security reasons it is recommended to create a separate ‘System DSN’ as explained in “Creating ODBC” section and assign different user name and password to your SOUL database.